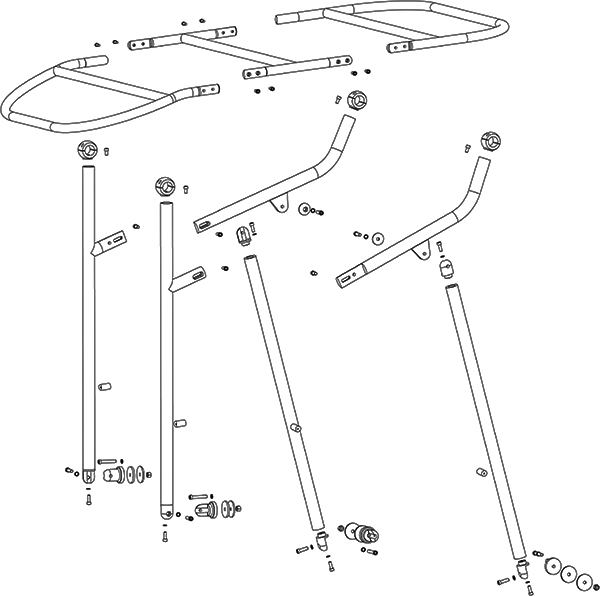
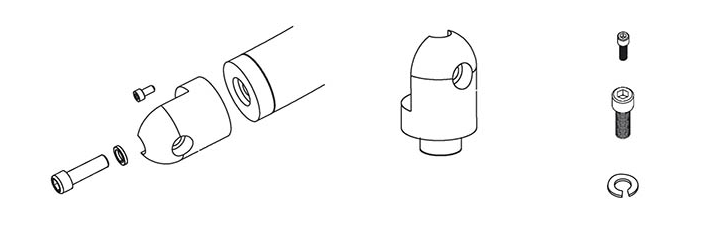
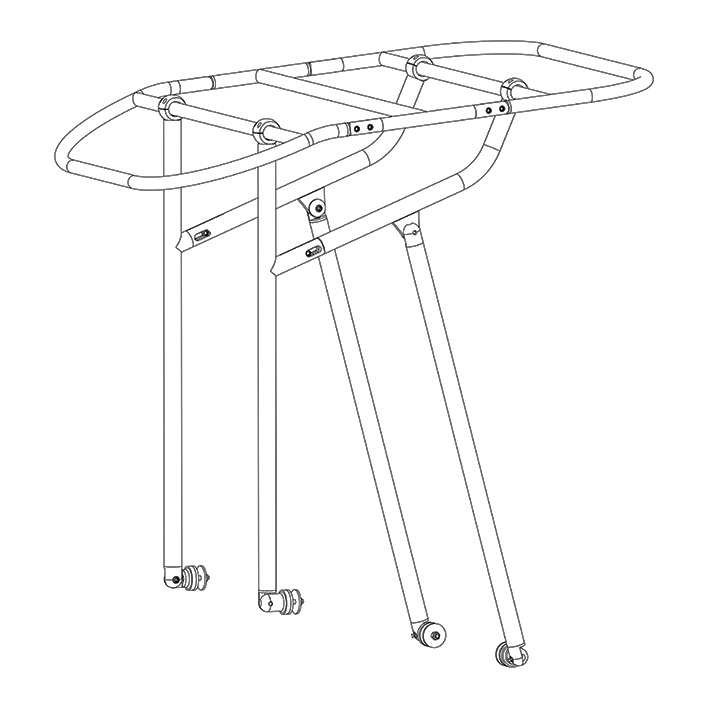
Exploded view for your reference
STEP 1:
Unpack and check the contents of the box.
Please read all instruction prior to installation.
If you are NOT sure of any part of the guide or you have any questions, please
contact the DOLPHIN T Tops.
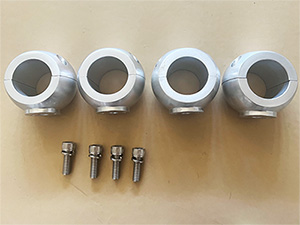
4x Clamps & bolts for attaching the 4x legs to the top frame.
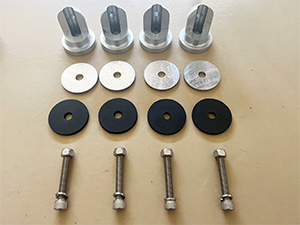
Mounting kit for attaching t top to the console.
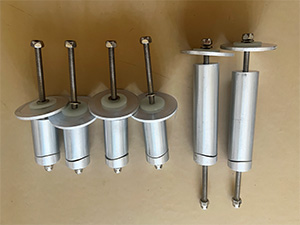
4x short stand-offs and 2x long stand-offs
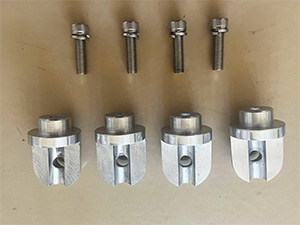
4x through hole fittings for t top feet
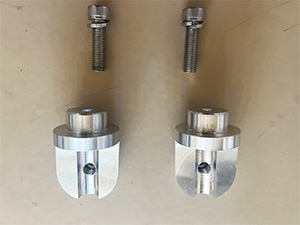
2x thread hole fittings for attaching rear legs to front legs
STEP 2:
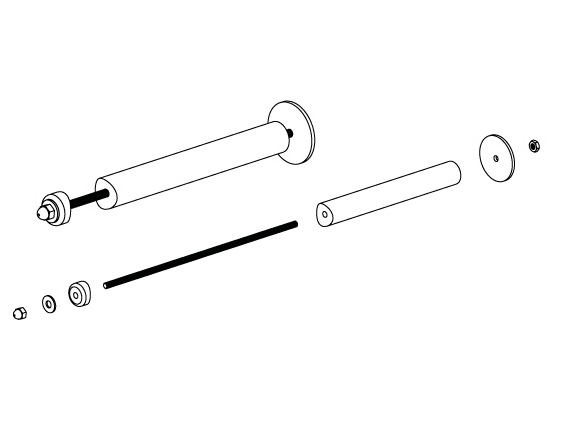
Attach the fittings to the legs.
Step 3:
Assemble the top frame.
Note the shape of the front section is narrow and also has a bend curve which faces downwards when attached to the side support frames of the T Top.
Note the lap joints have a number on the flat face match these up for correct installation.
DO NOT use washer for top frame assembly, the washer is for support frame only!


IMPORTANT: These small holes should be at the same side of each
bow otherwise it is not a correct installation and you may meet
trouble when attach the top frame to the legs.
Step 4:
Set up the t top assembly on ground. DO NOT tighten any bolt at this stage. Keep all fittings rotatable and all clamps movable.
Step 5:
Decide the best position where you will attach the t top to the console.
The distance between the front leg and rear leg is adjustable which make the t top universal to fit most consoles no matter big or small. You can attach the 4 legs at 2 sides, or attach 2 front legs in front of the console and attach 2 rear legs to the left and right side as shown in our cover photo.
Keep in mind the front leg is 55in (1.4m) long, so the position of front mounts should be 20-30 inches from the deck.
Take off one side of the support frame and put it on the console, mark the approx position where you will attach the t top.
Find a center reference of the console and re-mark the exact position with the black rubber pad, make sure the left and the right are symmetrical.
Tips: The width between the front legs doesn't need to keep equal to the width of the rear legs, but the difference must be less than 12inches, which means < 6inches each side.
Step 6:
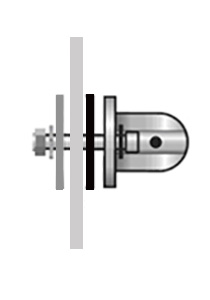
Attach the mounts to the console.
Check
the inside of your console for objects or wires before drilling into the
console.
Put the black round rubber plate under the metal mount. Put the aluminum round plate inside the console.
Step 7:
Attach the t top assembly to the mounts. Figure out the position of the clamps and make adjustments of all connections. If everything fits perfectly now you can tighten all bolts except the feet, because you may need to remove the t top to ground for wearing the fabric cover.
Step 8:
Attach the cover to the top frame. We recommend you put the t top on ground to wear the cover.
Note: there is a zipped front pocket which is zippered from side to side. Place this over the front section of the T top and zipper up now you can fold out over the rest of the top frame and hook over the back and zipper this section up and the velcro corner sections. Now you can pull tight the side section with zippers and velcro tabs.
Step 9:
Attach the stand-offs to the legs. After you re-attach your t top to the console, now you can find out where you would attach the stand-offs to the support frame. We supply 4x short stand-offs and 2x long ones, you only need 4 of them for installation, all stand-offs are cuttable to fit your needs. If you need longer stand-offs please go to our website www.dolphinttop.com to purchase.
CARE AND MAINTENANCE
Be sure to check and tighten all fasteners and connections prior to every use
Be cautious when towing or driving under obstacles, low hanging structures or
trees Leave dolphin t top in the erect position when towing behind a vehicle
Use soap and water to clean your tower. Avoid abrasive material that might
scratch or damage the tower protective finish. Always rinse and wipe down tower
after contact with salt (brackish) water.
WARRANTY
Dolphin T Tops warrants the product (not including other 3rd party accessories)
against manufactures defects. To claim you must contact Dolphin T Tops or is
Distributor. The product/part is to be sent to the Distributor for inspection
where it will either be repaired or replaced. (Unless otherwise agreed in
writing) The customer is liable for costs associated in shipping the
product/part to Dolphin T Tops.
Dolphin is not responsible for personal injury or damage to the boat caused by the use of the t top or any transport charges or cost of installation or removal of the t top. Dolphin is not liability for direct or indirect or consequential damages resulting from delay or improper installation.
CANOPY IS RATED FOR UP TO 45 MPH. Please remove canopy when driving above rated speed.
Warranty does not cover Anodized, polished or powder coated surfaces as well as any hardware corrosion they are specially excluded as their care and use cannot be controlled by Dolphin.
Warranty does not cover the spider coat gel cracking or damage from the installation or use of the t top on your boat. No dealer, retailer or manufacturer is the agent and may not assume any liability in connection with this warranty. This warranty is in lieu of all.
WARNING
The construction of your boat, design, thickness of flooring deck and walls and
overall design may cause movement at the mounting points. If the construction
of you boat causes movement at the mounting points or incorrect mounting
location creates added pressure on joints increasing movement of the t top it
voids warranty. If in doubt do not install the t top Check all bolts and parts
prior to use, especially after towing behind a vehicle, lowering and raising
after storage.
WARNING
Do not stand, climb or jump o# tower, do not tow the boat behind a vehicle with
the t top lowered. Do Not Ski, wakeboard, tow tubes, boats or other watercrafts
from the tower. Watch out whilst moving under objects, such as bridges, low
building and trees. Violations may result in product damages or serious personal
injuries.